Yes! I finally have my StudioBricks Vocal Booth! - Part 6
Yes, I finally have my vocal booth – a prototype of the new StudioBricks One Plus – set up and ready to go!
The delivery process itself was an interesting experience. Shipping a vocal booth is not a UPS, DHL, or FedEx experience. A 600 kg (1300 lbs) crate needs to be shipped the old fashioned way. But, with 21 century conveniences, you can get alerts of the cargo ship’s location as long as it is within range of beacons on either side of the Atlantic. There were about 5 days when the ship’s location was not updated.
 The crate arrived in Port Elizabeth, NJ on schedule. The people at ShipCo contacted me to handle all of the customs paperwork at this point. Since I did not have an EIN number, my paperwork was a lot more complicated than it needed to be. I had to fill out the sort of paperwork one would file if I were moving a piano from a family residence abroad to my home in the USA. It was 6-8 pages of confusing information. The people at ShipCo were great about helping me get it all done. But, if I had that EIN, it would have been a 1 page form with about 4 simple questions to answer.
The crate was placed on a smaller vessel and taken up to the Boston Shipyard. Once the crate was unloaded in Boston, I was contacted about delivery. And, since I was having this delivered to my home, delivery was subject to the availability of a truck with a lift gate. Be very clear with them that you do not have a loading dock at your home (unless you really want to unpack your booth inside the truck and take it out piece by piece).
 When delivery day came, I got a phone call from the driver when he was 30 minutes from my home. I got there a few minutes before him. The crate was huge, almost too large for the lift gate. He got it down and moved it close to my back door. That evening, my family helped me unpack everything.
I got all of the pieces inside and arranged them in groups (A1-A5, B1-B5, etc). Then, I stopped and watched a few StudioBricks assembly videos (just to be sure that I knew what I was doing).
Assembling a StudioBricks Booth
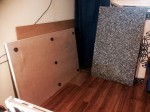 Screw rubber feet into the bottom of the Ground piece
(I forgot to do this and wound up disassembling/reassembling the entire booth the next day since the rubber feet help with sound isolation.)- Place floating floor on top of the ground piece
- Level the ground by adjusting the rubber feet
- Slide all but the last A Level Brick into place
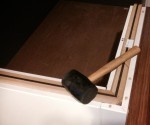 (In my case, that was bricks A1-A4, leaving me just with A5. NOTE: If these pieces seem to require too much force, take my wife’s advice, and let the pieces dry out from their journey across the Atlantic. They should slide together with minimal effort. If you live in a wet environment my best advice is patience and a rubber mallet are your new best friends.)
 - Slide the incredibly heavy door into place
- Slide the last A Level Brick into place
- Assemble the door handle
- Slide all of the Level B bricks into place
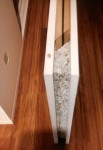 (At this point, the booth should be sturdy enough for you to open the door to aid in the rest of the assembly.)
 - Repeat the process until your walls are full height
(Usually this will be through Level D, but in some configurations this can be Level C.) - Place the wooden tongue pieces into the groove of the roof’s frame
- Slide the roof frame on top of the booth
- Be sure the door is closed
- Tap the frame into place
- Slide the roof cap onto the booth
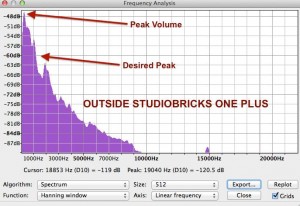
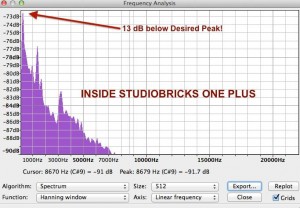
This is a good time for you to take a break. And, after your break, you might want to do a quick recording of the ambient noise outside and inside your booth. Even with my initial mistake of forgetting the rubber feet, I had a noise drop of almost 30dB – which was incredible!
Outside the booth:
Inside the booth:
Placing the Vicoustic Panels
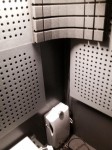 My booth came with 9 Visquare Premium panels and 4 FlexiPanel A50 panels. Place the Visquares first (1 panel is meant for the ceiling). And, be certain that you do not cross any of the seams between panels when placing them. If you do, you will not be able to take apart your booth without breaking the panel. Don’t worry about spaces left in the corners of your booth when placing them. The FlexiPanels take care of that problem.
The FlexiPanels stay in place without any adhesive. So, you curve them into gaps left between the Visquares creating rounded corners and eliminating bass problems and reducing the need for bass traps.
The Ventilation Unit
In the box with the ventilation unit you will find a mounting diagram. Tape that diagram to the inside of your booth lining the image up with the pre-cut hole for air exchange. Shine a light into the hole from the outside to be sure that the diagram truly lines up. The directions ask for an 8mm hole. And, unfortunately, the local hardware store only carries drill bits in imperial measurements. After doing the math, I wound up purchasing a 21/64″ bit. Drill the 2 holes, slide in the mollies, and drew in the mounting screws. Then, hang the unit on the screws. It should fit snugly.
Booth Lighting
The booth comes with an LED lighting fixture. Though its instructions show it being screw mounted, I found adhesive panels over the screw holes and no screws enclosed. So, I removed the backing and pressed the fixture into place. You may want to affix the light so the power cable comes down the same corner that has the ventilation units power cable.
The Power Strip
The booth comes with a 3-plug power strip. And, since I live in the USA, it also came with a power converter for 110v.The power strip itself can fit snugly into the corner behind the ventilator so you only have to run the power strip’s cable across the floor of the back of the booth toward the cable passthrough.
The Cable Passthrough
The best tutorial on setting up the passthrough is in this video from StudioBricks. Before setting it up, decide whether or not your computer will live inside or outside the booth. This will affect how many cable spaces you will need to prepare.
All that is left is for you to place the vent covers on the outside of the air exchanger and on the inside of the roof. And, congratulations, your booth is now complete!
Words of advice
Watch as many assembly/disassembly videos as you can before working on your own booth. They are all slightly different, and they are all helpful. I am including a couple of them here.
Assembling a One Plus:
Dismantling a One Plus:
Final Thoughts
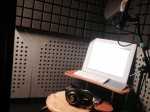 I wish I had thought to ask Guillermo about reversing the placement of the cable passthrough and the ventilation. That would have worked better in my space. Aside from that, I have absolutely no regrets or complaints about the entire process. The StudioBricks was great during the design and build process. The shipping company was efficient during transit. And the build was manageable with 1 or 2 people. I will be tuning the booth over the next few weeks. And may purchase additional foam panels depending upon my results.
☕ Cup of Coffee
A ridiculous amount of caffeine was consumed while researching.
Add some fuel if you would like to help keep me going!
☕ $5 ☕ $10 ☕ $15 ☕ $20 ☕ $25 ☕ $50
Related articles
Part 1 – Do I really need a vocal booth?
Part 2 – Yes I really need a vocal booth!
Part 3 – I finally bought a vocal booth!
