Ocenaudio for Voiceover & Audiobooks - October 2018 Update
Ocenaudio (properly pronounced: Oh • sen Aud • io) is a wonderful, free audio program that is loved by voice actors everywhere. It has evolved quite a bit over time, so I thought it would be a good idea to go over everything that you’d need to know.
First Stop: Preferences…
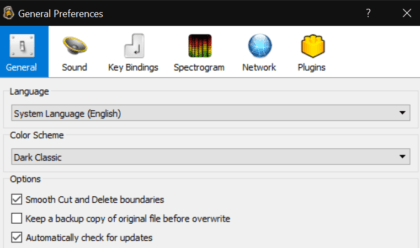 The settings in General Preferences are pretty straight forward. Choose your Language and choose your theme. The next three options do bare your consideration. Smooth Cut and Delete boundaries definitely helps with edits. Keep a backup copy of original file before overwrite also feels like a good idea (even though I don’t have it checked in the picture). And, because the software is in active development, keeping Automatically check for updates checked also makes sense.
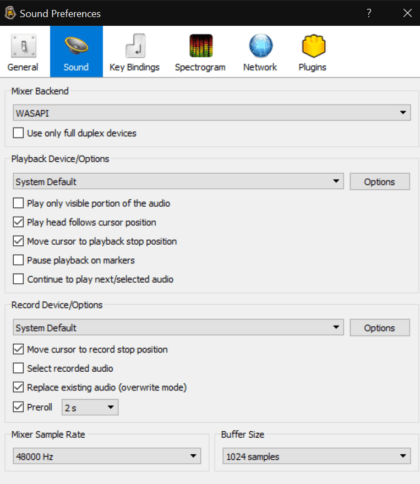 The Sound Preferences are next. If you are on macOS, you will want to choose Core Audio as your Mixer Backend. If you are on Windows, choose ASIO if you are connecting to an interface and XLR mic. Since this is a screenshot from my laptop, not my studio machine, I’ve left mine on WASAPI which was the default.
Set your Playback and Record Devices to your interface (or USB mic). Under Playback, I check Play head follows cursor position and Move cursor to playback stop position and leave the rest unchecked. Under Record, I check Move cursor to record stop position, Replace existing audio (overwrite mode), and Preroll. You can choose the length for your preroll from the dropdown menu.
For most non-video voiceover work, set Mixer Sample Rate to 44100 Hz. And, set your buffer size as low as you can without hearing pops and crackles when you record (this part takes a bit of experimentation).
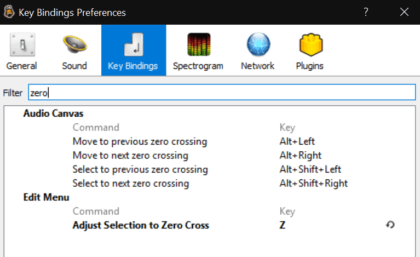 Key Binding Preferences are simple. One really great thing about Ocenaudio is that you can customize all of the keyboard shortcuts to whatever makes sense for you. For example, I like to assign Adjust Selection to Zero Cross to the letter Z. Scroll through all of the commands, you will find many that don’t have shortcuts. You might find some of them useful.
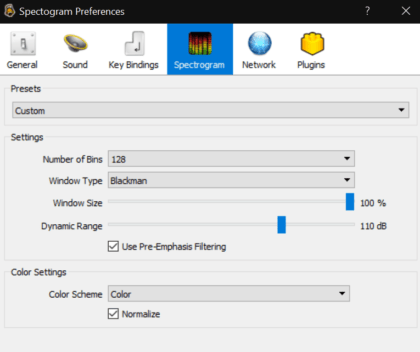 The only thing I tend to change on the Spectrogram Preferences is that I set the Color Settings to Color. I tend to leave the rest set to defaults.
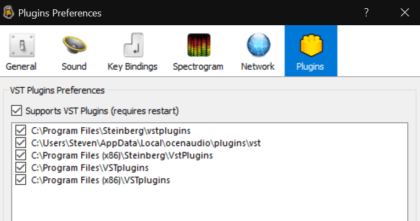 I usually skip over Network Preferences and go to Plugin Preferences. Make certain that all folders that hold your plugins are shown. On macOS, this will also list AU plugin paths.
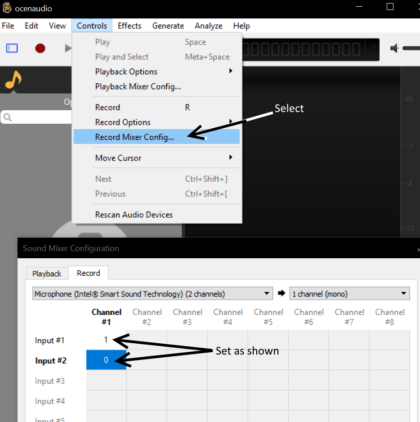 Next, close your Preferences, go to the Controls menu, and choose Record Mixing Config. This will open the Sound Mixer Configuration window. Choose your mic/interface in the left dropdown and 1 channel (mono) in the right dropdown. Then, set the window as shown (If your mic is on Input 2, 3, etc of your mixer, adjust as needed).
A common issue that people have with Ocenaudio is that the recording seems quieter than it does in other software. That is because the default Record Mixing configuration splits the volume based upon the number of channels it sees on your interface (If you have 2 channels, each is at 50%. If you have 4 channels, each is at 25%). Making this change, fixes the issue.
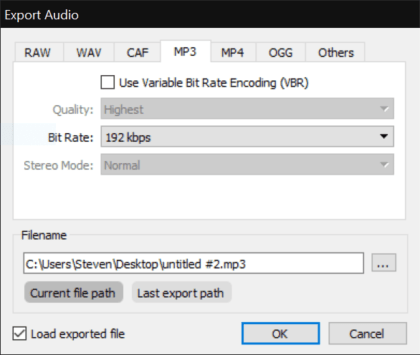 You should also know about the Export Audio window that you can open from the File menu. In this example I am set to export the audio as an MP3 with a bit rate of 192 kbps. Many other formats (including FLAC) can be found under the Other tab. This is much more flexible than the choices that you’ll find in the Save or Save As dialog boxes.
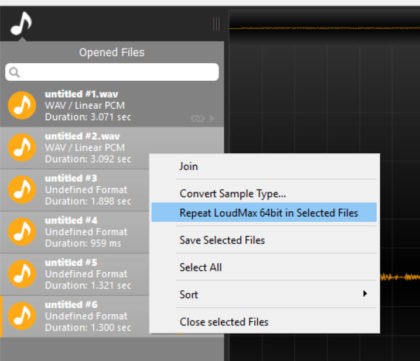 An often overlooked feature of Ocenaudio is its ability to apply its most recent action to multiple files at once. For example, a common last step before delivering an audiobook is to run a limiter (like Loudmax) set with both its Threshold and Output set to -3.0dB (This is called running a Limiter in “Brick Wall Mode,” or a “Brick Wall Limiter.”). After applying the Limiter to 1 file, I can select all of the other files in the book and run the Limiter on all of them at the same time.
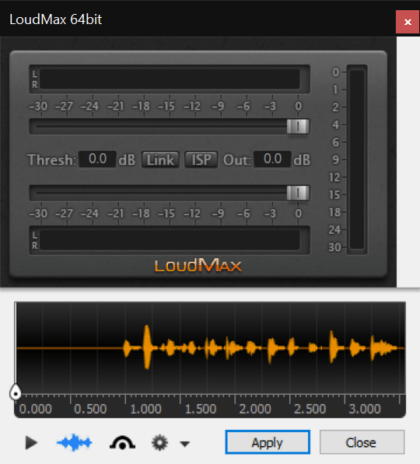 Our last stop for today is to take a closer look at the Plugin Window. Below the standard interface of your plugin (in this case Loudmax), there are a few buttons.
The arrow is a playback control allowing you to hear how your plugin will make the audio sound before you apply it. This is really helpful if you are experimenting with different settings.
The waveform (in blue in this image, shows you a miniature version of the waveform of the audio in the file. You can select just a portion of the audio to test your settings on (also useful).
The next icon is an eye (which can either be open or closed). When the eye is open (as in this picture, your plugin works normally. When the eye is closed, you are bypassing your plugin to hear your audio as it was before you opened this window (very useful if you’ve been playing with settings for so long that you’ve forgotten what the original audio sounded like).
The gear and dropdown is where you can save any useful settings for a plugin as presets. Making it so much easier for you to come back to the same plugin in a different project and use the same settings without needing to remember them. Combining this feature with the multiple file select and apply feature mentioned earlier in this article can save you lots of time when processing a long audiobook 😉
Is your head spinning yet? I know this is a lot to take in. Ocenaudio is a very capable piece of software. There is so much more to it, but this should be enough to get you started. If you have any questions for the developers, you should use this form from their website. Following them on Twitter or Facebook isn’t a bad idea either.#### ☕ Cup of Coffee
A ridiculous amount of caffeine was consumed while researching.
Add some fuel if you would like to help keep me going!
Click here to give whatever amount works for you and thank you 🙂

