My REAPER setup for Audiobooks
Like ProTools, REAPER is a professional grade DAW (Digital Audio Workstation). It runs on Windows, macOS, and Linux, and a license can be purchased for as little as $60. Like most true DAWs, REAPER is designed first and foremost around music production. So, some configuring is needed to optimize it for audiobooks and other voiceover work.
You can watch the video below to preview the workflow before you change anything…
Before I begin, here’s a bit of a disclaimer…
There are many ways to set up REAPER. Some of them will look/act quite differently from what I am going to present here. This is one of those situations where there really is no one right way to do things.
What I am about to present is a simple way to configure and use REAPER for audiobook work that I have developed over 7+ 13+ years (since 2010) of use this software as a professional narrator.
I am running REAPER version 6.25 as of the time of this article (currently v7.38 and it all still works). If you are running v5 or earlier, I cannot guarantee that my settings will work for you. Future versions of the software should be able to import these settings without an issue.
The theme that I am using is called ClearView. You will get it (along with some of my other favorite themes) as part of the preference pack you’ll be downloading.
Also, I have run REAPER on macOS, Windows, and Linux. The software runs exactly the same on all 3 platforms (something that cannot be said about ProTools). So, if the images look like a different operating system from the one that you are using, don’t worry.
INSTALLATION
Let’s start by installing REAPER. Head over to https://reaper.fm and download the correct version of REAPER for your computer. If you are unsure of which version is correct, please consult with more tech savvy friends before continuing.
Once you have installed REAPER, please head over to https://www.sws-extension.org and install the version of the extension that matches the version of REAPER that you installed in the previous step.
The SWS/SM extension adds features to REAPER that we will need later on. Please follow all instructions and get this properly installed before continuing. On some versions of macOS, you may need to allow this plugin on a Security Control Panel in order to enable it fully.
START REAPER
If you have never run REAPER before you are likely to be greeted with the following screen.
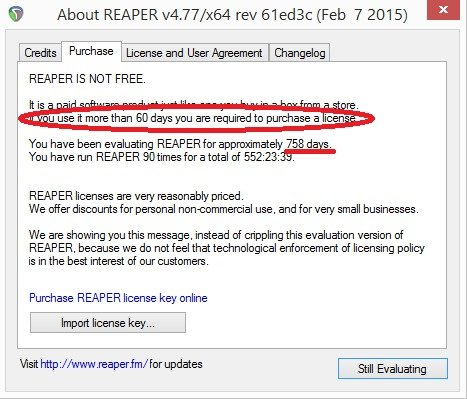
If you own a REAPER license, enter it here. If not, click Still Evaluating. Please note, that unlike other software REAPER does not disable any features in Evaluation Mode. It just shows this dialogue at startup to remind you to register.
After you’ve started REAPER, go to the menu and open:
Options > Preferences > General

If you have previously used REAPER, you should click on Export configuration before continuing and save your old settings to a file. It will give you an easy way to “undo” everything that we are about to do in one simple step.
CHOOSE YOUR MONITORING METHOD
Many audio interfaces offer what is called Zero latency Monitoring. This allows you to eliminate the delay that can affect audio when it is run through a DAW by actually playing it into your headphones before sending the audio to your computer. If you are set up this way, choose No Monitoring in the step below.
Wait, if my interface can offer a no latency way to listen to yourself, why would someone choose anything else?
Since you are listening immediately after the microphone and before the computer, any issues that are introduced later in the chain would be missed. Hums, pops, and other distortions can occur that you will not hear with zero latency monitoring. If you are configured properly, these are rare but they do happen.
Also, if you decide to use Input FX to make a virtual channel strip (described later in this article), then in order for you to hear how those effects change the sound while you are recording, you will need to use the Monitor in DAW settings.
If you change your mind later on, you can always come back to this step and choose the other file.
Download one of the following files:
Monitoring in DAW or No Monitoring
Click on Import configuration as seen in the window above and select the file that you just downloaded. Import all settings from within that file.
Now, quit REAPER. Then, start REAPER again…
If when you start REAPER this time, it asks you to save a new project, please ignore it for now. We will deal with that when we restart REAPER one more time.
FIXING THE REAPER CONFIGURATION FOR YOUR COMPUTER
After you’ve started REAPER, go to the menu and open:
Options > Preferences > Audio > Devices
Configure REAPER for your Audio Interface here. Do your best to get your Buffer Size down as low as possible (64 or possibly 32 is preferred, but 128 would be acceptable). If you need assistance, please hire a professional audio engineer to assist you.
Next, go to the menu and open:
Options > Preferences > General > Paths
And change the directories shown to match the path to the documents folder on your computer (usually by replacing /home/steven/ with something unique to you)

Next, open Options > Preferences > Project
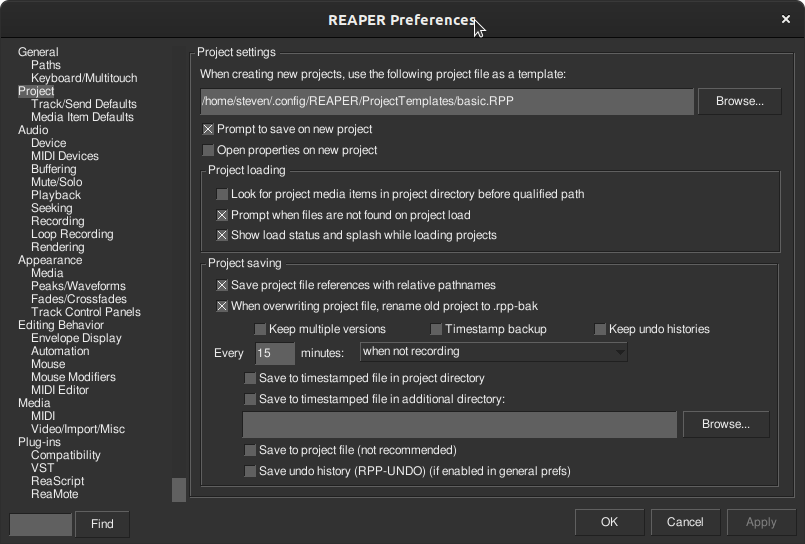
Be sure that the path in this window starts with whatever you set the paths in the previous window to start with.
Next, open Options > Preferences > Plugins > VST
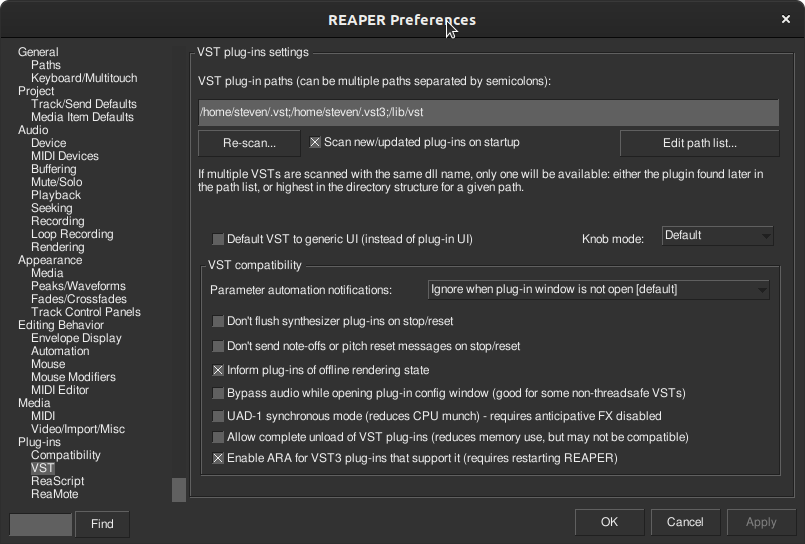
Be sure that the path in this window starts with whatever you set the paths in the previous window to start with.
Next, open File > Render

In File name, replace my name with yours.
Change Render to to match the paths on your own computer.
Next open File > Consolidate/Export

Update the Output consolidated files to directory path to match your own computer.
REAPER should now be properly configured, let’s record our first audiobook. Please restart REAPER…
RECORD AN AUDIOBOOK
First, if you have not created a project yet, you will be prompted to save your Project. If you are not prompted, please make a new project. I named my project test-project.

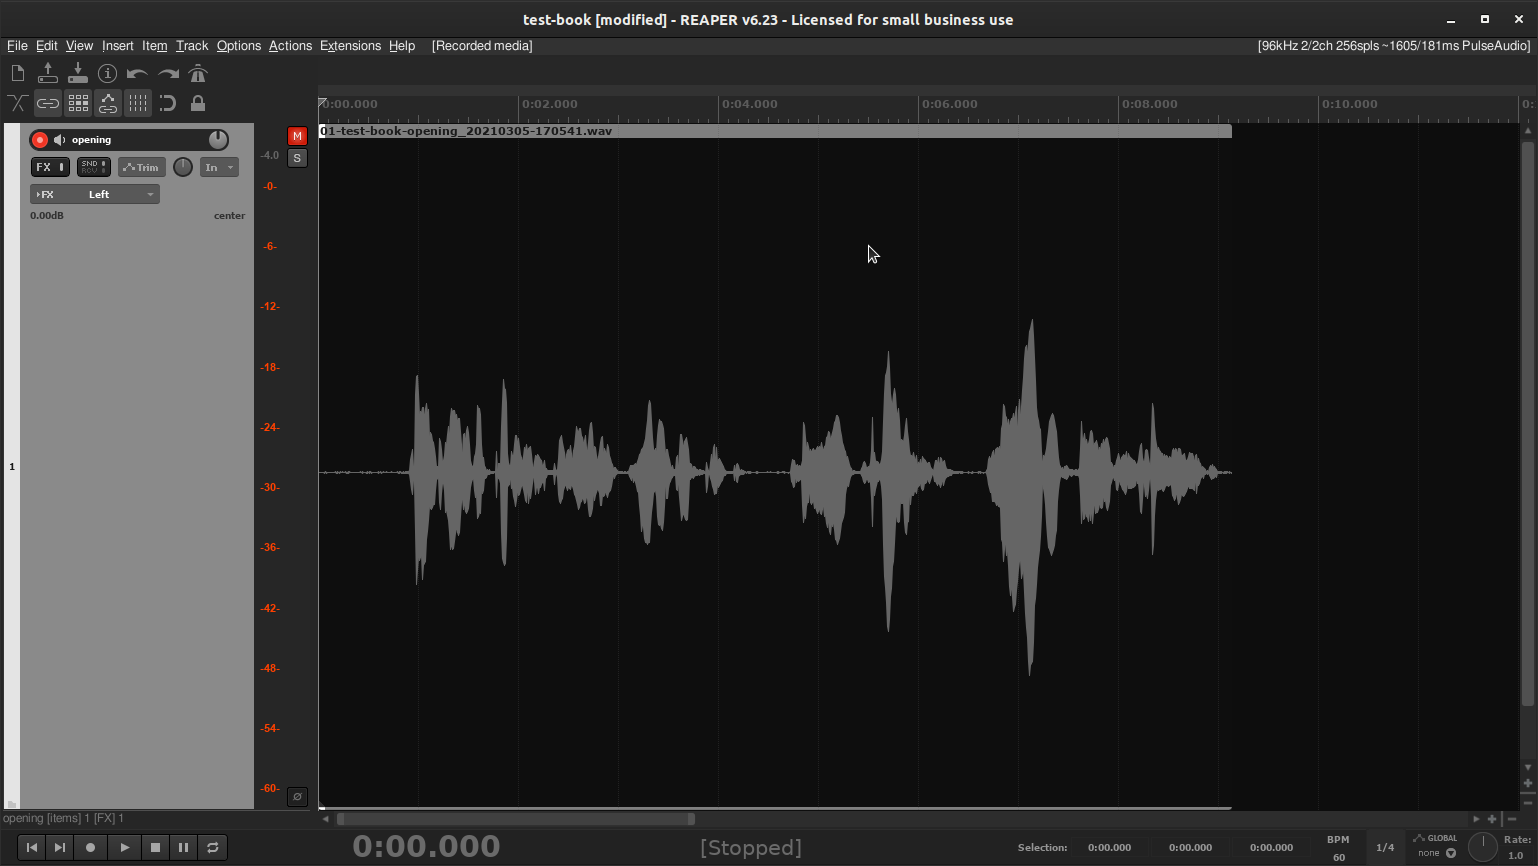
You will see that the new project will appear fully ready to record, and it will have named the first track opening, as in opening credits.
Now, I would like you to open the Actions menu…
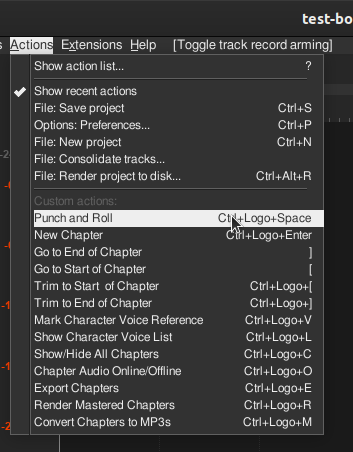
From Punch and Roll downward are all of the Custom Actions that I have created for REAPER to simplify audiobook work. They are all defined below:
QUICK NOTE: I have built auto-save into most of the commands where it makes sense (like Punch and Roll or New Chapter). If you were to try and quit without one of my auto-saves having been triggered, REAPER will prompt you to save your work. If it doesn’t prompt you, assume that one of my auto-saves did it for you.
Punch and Roll – A style of recording where you place the cursor before the last mistake that you made, usually between sentences or paragraphs. When you start recording, you will hear the last few seconds of what you recorded previously, then you continue on from that point. If done correctly, you wind up with a seamless edit that sounds like one continuous take.
(Note: I call them Chapters not Tracks even though each chapter will live on its own track. I do this because narrators tend to think in terms of books, and this is conceptually simpler)
New Chapter – When you get to the end of a Chapter (or any other book section), you enter this command. Doing so, hides the previous chapter, sets up a new one, and asks you to name it (prologue, foreword, Chapter 22, epilogue, etc)
Go to Start of Chapter/Go to End of Chapter – Set to use brackets [] and alternatively Alt + [ or Alt + ], this command helps you quickly jump around your recorded audio
Trim to Start of Chapter/Trim to End of Chapter – Only useful if you are delivering final (sale ready audio), this command cuts the heads and tails of files to the proper length. All you need to do is place the cursor right where the talking in the chapter starts/ends then issue the command
Mark Character Voice Reference – Place the cursor where an example of a character’s voice begins and issue the command. You will be presented a window that wants you to enter the name of that character.
Show Character Voice List – Entering this command will show you a clickable list of the character voices marked using the previous command. You may need to use the next command described below along with this command if your character voice appears in a different chapter.
Show/Hide All Chapters – This command will toggle between showing you all chapters (and muting them) and showing you only 1 chapter (and setting it to record). Seeing all of the chapters allows you to move from one chapter to another. It is also useful when you are exporting chapters to send them to a publisher or engineer.
Chapter Audio Online/Offline – Not an often used command. If you are seeing that some audio is marked as “Offline” (done to keep it from being loaded into memory), then you can use this command to toggle between the 2. Odds are you may never use this command. But, it is there in case you need it.
Export Chapters – Use this command to bring up the window that will export your work to send to a publisher or an engineer. You will most commonly use this feature while showing all chapters of your project.

In the upper right of this window, setting Tracks to All will export all tracks. Setting Tracks to Selected will only export the tracks that you have selected. The latter is useful for exporting Corrections (CRX) or in case you are asked to re-export certain chapters.
Render Mastered Chapters – This differs from the export function discussed previously because it creates the final audio by rendering it “through” any effects (FX) that you (or an engineer) has added with the intention of bringing your raw files up to deliverable specifications. FX can be added on each individual track or on the Master Track. In either case, they will affect the final audio. If you need help configuring this, please hire an engineer to work with you.
Convert Chapters to MP3s – If you use this command and select audio files within a specific folder, you can convert those files to MP3. It is always best to work in a lossless* format (like WAV or FLAC) all the way until delivery. If the recipient of your files wanted MP3s, you can use this command to convert the audio into the lossy* MP3 format.
Lossless vs Lossy Audio Explained
LAST THING BEFORE WE START RECORDING
Open the menu Actions > Show Action List

If you select any of the actions marked Custom: you will see that you can change their shortcuts and I encourage you to do so. I made these shortcuts because they are easy for ME to find on MY keyboard in a dark booth without looking down. Please take a few minutes and change them to shortcuts that are easy for you.
START RECORDING
Your first "chapter" is opening, better known as "Fantastic Publisher presents Title of Book by Book’s Author, narrated by Wonderful Narrator." Feel free to change those words to match the requirements for your project.
Press the Punch and Roll command, wait for the couple of seconds of pre-roll then narrate. Once done, click spacebar.
Now that you have finished recording the credits, use the New Chapter command to start a new chapter. Let’s name this chapter, Chapter 1.

Now, let’s pretend that an example of a character named Irving starts somewhere on the screen. Click where Irving starts to talk and invoke the Mark Character Voice Reference command. After that, choose a different spot on the screen for a second character that we’ll call Hortense.

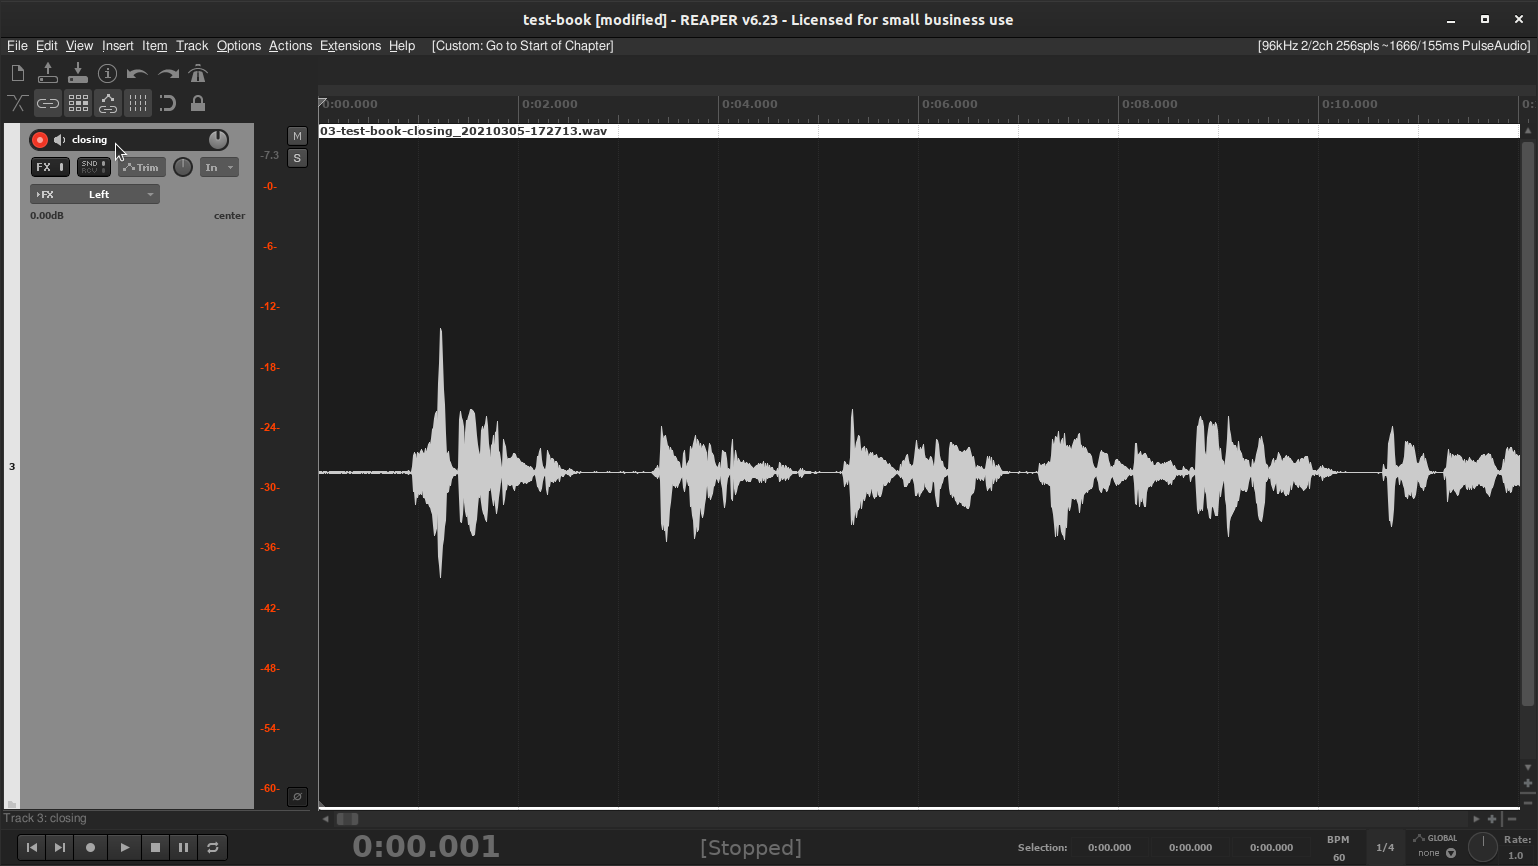
Now you can close that Character Voice List window, and I’d like you to use the New Chapter command again. This time please name the chapter closing (yes, it is a really short book).
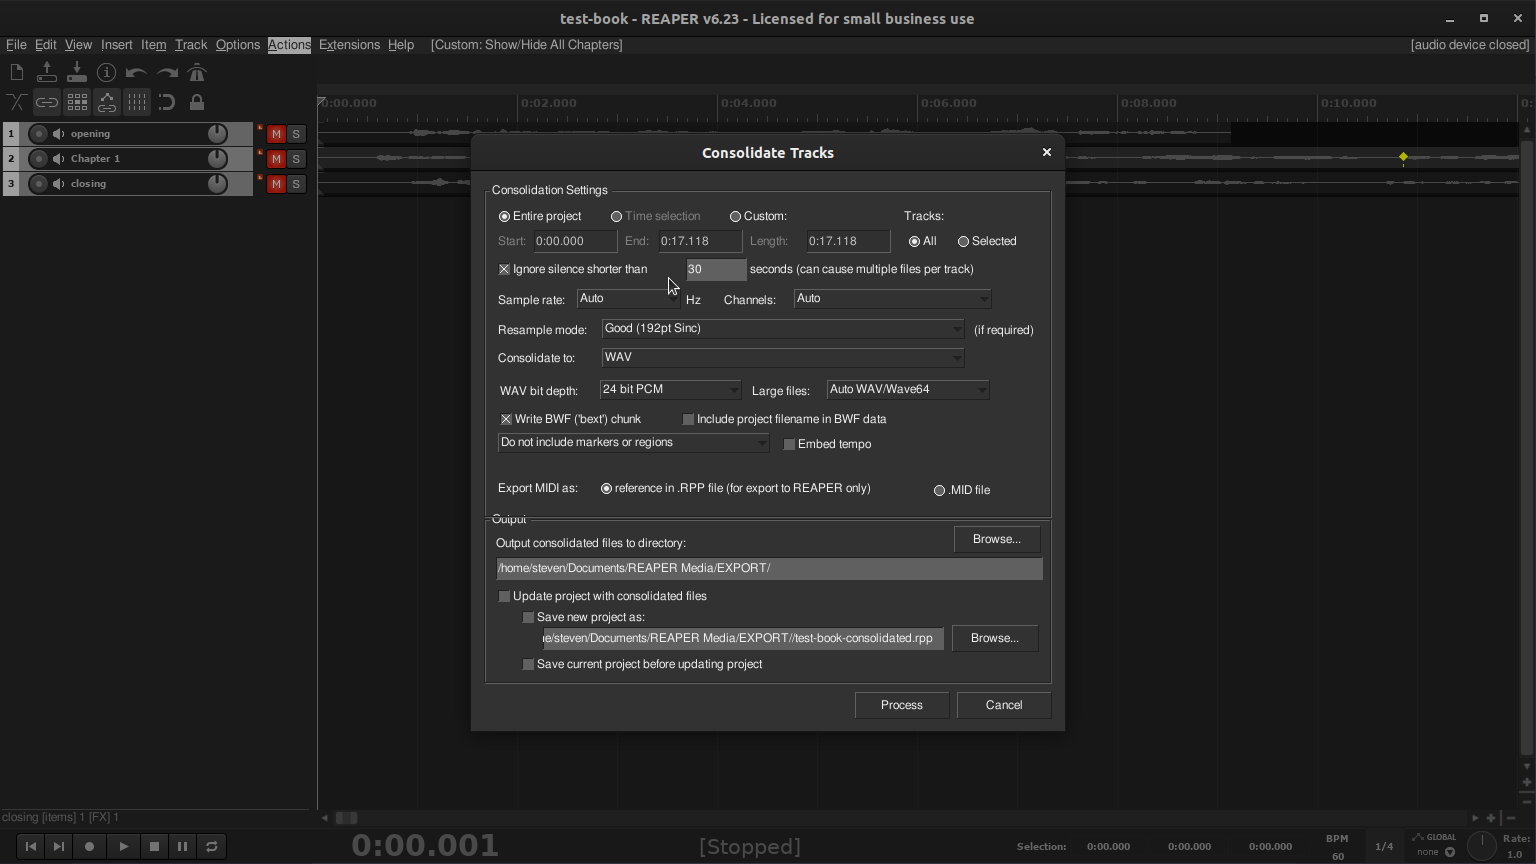
As long as you leave Tracks set to All, you should get 3 WAV files named as follows:
- 01-opening-consolidated.wav
- 02-Chapter 1-consolidated.wav
- 03-closing-consolidated.wav
And these 3 files would be in a folder named EXPORT (unless you changed that folder name to something else).
Publishers often use codes as part of the names of books, like BK21027_GreatBook. So, I rename the folder from EXPORT to BK21027_GreatBook, and then I use a bulk rename tool to replace -consolidated with _BK21027_GreatBook.
That leaves me with a folder named BK21027_GreatBook containing the following files:
- 01-opening_BK21027_GreatBook.wav
- 02-Chapter 1_BK21027_GreatBook.wav
- 03-closing_BK21027_GreatBook.wav
Good bulk renaming tools that you can use are:
macOS: https://mrrsoftware.com/namechanger
Windows & macOS: https://www.advancedrenamer.com
Linux: usually build in (see below)
I then send the folder named BK21027_GreatBook to the publisher in the way that the particular publisher prefers (FTP, WeTransfer, DropBox, etc).
PRACTICE PUNCH AND ROLL
Show All Chapters, click on Chapter 1, then Hide the other chapters. Now you should be seeing Chapter 1 again.
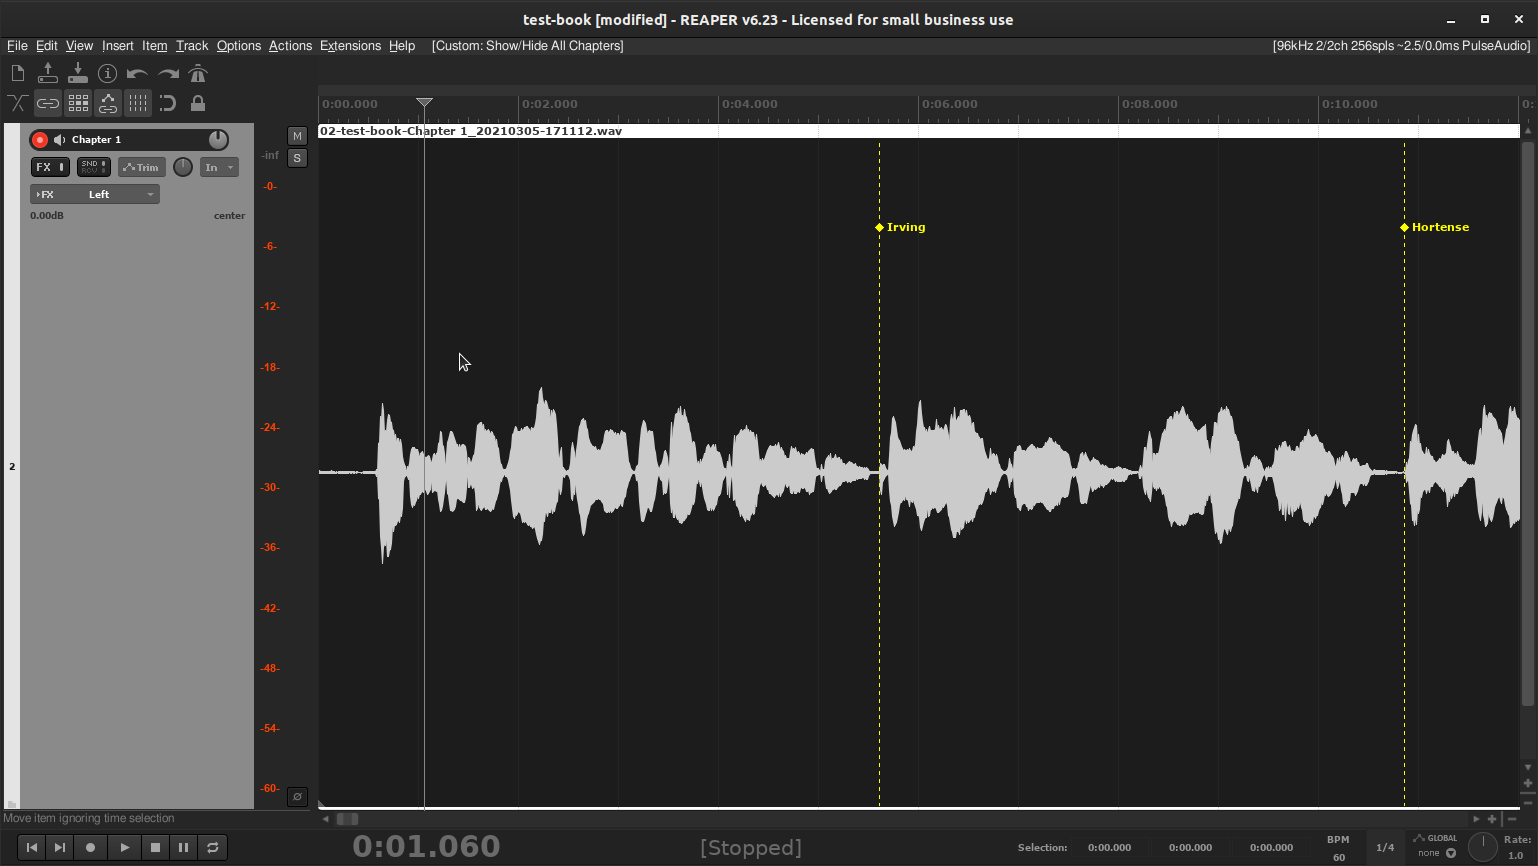
Now pick a spot on this chapter where there is some silence so you can easily punch in.

I am choosing a spot between the 2 character references.
If I start recording using Punch and Roll, I will hear the last few words I said before the audio reaches the cursor. Once it reaches the cursor, it will start recording. It will then lay down new audio OVER the previously recorded audio.
Typically, you are intending to do this. And you simply continue recording the rest of the chapter. If you needed the audio that you recorded over (very rare, but it does happen), it is still there, in a layer UNDER the newer recording. And you can go into the project to recover it if you ever want to. This is what is meant by non-destructive editing. The old layers still exist and can be recovered without you needing to re-record anything.
MASTERING BASICS
If you work exclusively for publishers who request raw audio from you, you may not need this section. But, for everyone else, understanding how to at least do what’s called a Rough Master can be useful.
A Rough Master does not necessarily meet final specifications. It applies things that you generally use for a particular talent in a particular space. So, if after working with an engineer, they show you good compression, deEssing, EQ, or other clean up FX settings for your particular voice in your particular booth, you can use these settings every time, knowing that you may not hit spec exactly, but you will get very close.
Narrators often will Rough Master auditions when the audition spec did not ask specifically for raw audio.
Explaining Rough Mastering is really beyond the scope of this article. If there is enough interest, I’ll circle back and post an article on that topic.
Effects (FX) live in multiple places within REAPER. For our uses, 3 of them come into play:
- Input FX
- Track FX
- Master Track FX
Input FX live between your microphone and REAPER. They can be used to simulate what is known as a Channel Strip.
These FX wind up being baked into your raw audio and cannot be removed. As such, you will want to limit your Input FX to a simple HighPass Filter and possibly a very gentle Downward Expander (but only if you have an audio engineer help you configure one).
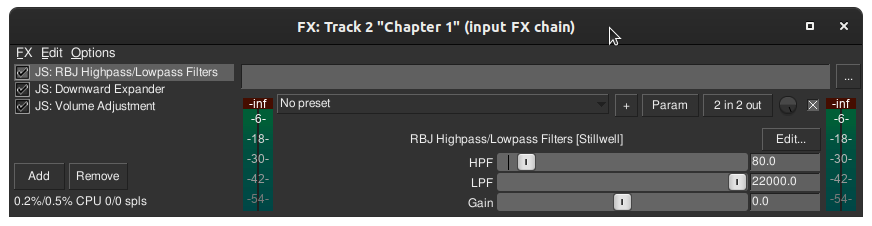
A HighPass Filter that comes with REAPER set to 80Hz (a common setting)
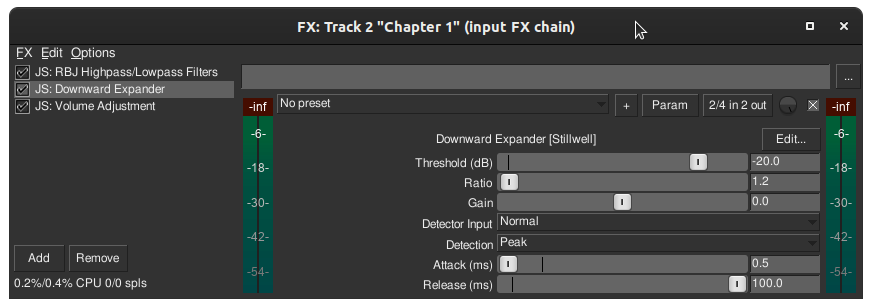
A really gentle Downward Expander configured to tame some room noise.
PLEASE NOTE: My settings are meant for MY gear in MY booth. You really do need an engineer to help you configure this one properly for you.

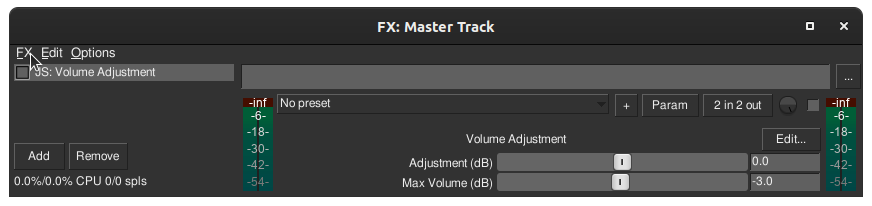
A Volume Adjuster plugin set to not adjust volume but merely enforce a cap to the loudness.
I never get this loud when I record anyway. So it is here more as an insurance policy than anything else. If your levels are set properly (with the aid of an engineer) then a plugin like this is simply a safety precaution that should not affect your audio.
When you use the Export Chapters function, Input FX are the only ones that affect your audio. So both Track FX and Master Track FX are only useful if you are expected to deliver mastered audio.

Track FX can be used to modify something on a per chapter basis.
If I was not feeling well one day and I was a bit quieter on a chapter or two, I could use an effect like this. I would change Adjustment to raise the volume a bit. You can also see that I have implemented a -3dB cap here (the loudest any audiobook track should ever get when mastered).
If I wanted to affet ALL the tracks equally, I would put an effect on the master track.
Then, if I Render Stems through that Master track, I would wind up with individually mastered tracks that all have the same FX applied.
In all 3 cases, Input FX, Track FX, and Master Track FX, please work with an engineer to find the right settings for you.
DOING CORRECTIONS (CRX or Pickups)
Part of the advantage of using REAPER in this way for audiobooks is that all of the audio for a particular project is within a single project. This holds true for recording corrections as well. There are times where corrects may arrive weeks or months after you have recorded a book. And, it is possible that you may have changed settings on books recorded in the interim.
If you open up that old project, click on the closing chapter to select it, then use the New Chapter command, and record your corrections in a new track in that old project, your corrections will have exactly the same settings that you had when you recorded the book.
EXPORTING YOUR SETTINGS
We started with you importing my settings and customizing them for you. Before we go any further, I would like to encourage you to export your settings to a file. And, if you change your settings, please export them again.
This way, if you ever accidentally change some settings and are not certain what you did, you would be able to re-import those settings and be back up and running immediately.
Head over to Options > Preferences > General and Export configuration.
On March 17, 2021, I updated the configuration files to include one of REAPER’s built in backup systems. Inside your project folder you will see a file whose name ends .rpp-bak
If you ever open this file, it will present you with a list of timestamps. Clicking on one of these will open your project as it was at that point in time. So, if you’ve accidentally lost something important, this may save you a lot of re-recording time.
But, this setting makes that .rpp-bak file grow a lot. So, if you have limited drive space, you may want to turn it off.
You’ll find that setting at Options > Preferences > Projects
If you want to turn it off, uncheck Keep multiple versions. If you choose to do that, the .rpp-bak file will only contain the version immediately prior to the currently saved version.
If you do turn this off, please have some sort of automated backup system (like Time Machine on macOS) in place. Every operating system has built in backup options these days. So, you should be able to find something that will work for your workflow.
Cup of Coffee
A ridiculous amount of caffeine was consumed while researching.
Add some fuel if you would like to help keep me going!
Click here to give whatever amount works for you and thank you 🙂
A big Thank You to Gail Shalan who helped test this setup and get it ready for others to use. Gail is an amazing actress, narrator, and puppeteer. I have hired her for high profile projects in the past and will do so again as often as possible. She brings an incredible amount of skill to the fore in everything that she does. Take any opportunity that you get to work with her. You will not be disappointed.
